Pet Odor Removal: Creating a Fresh and Inviting Home Environment

If you’re a pet owner, you know the joys of sharing your home with a furry friend. Pets bring companionship, fun, and love into our lives. But along with the cuddles and tail wags can come some less pleasant side effects—namely, stubborn pet odors and stains. Whether it’s a little accident from a new puppy or lingering smells from a cat’s favorite nap spot, dealing with pet odors is part of the package. Fortunately, effective pet stain and odor removal techniques can help you maintain a clean, fresh-smelling home without sacrificing your bond with your beloved animal.

Why Pet Odors Linger

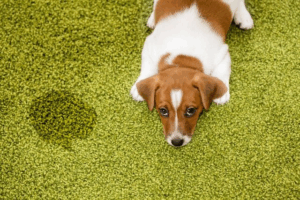
Pet odors aren’t just a surface problem. The smell can seep into carpets, upholstery, and even walls if not addressed properly. Urine, in particular, contains ammonia and bacteria that intensify over time, especially if the affected area isn’t cleaned thoroughly. Even after a stain looks like it’s gone, the odor can linger, leading pets to re-mark the same spot.

What makes these odors so persistent is the organic nature of the stains. They’re not just dirt—they’re biological. That’s why ordinary cleaners often aren’t enough. Pet odors require specific enzymatic or bio-enzymatic cleaners that break down the source of the smell at a molecular level. Get More Info about the best products and techniques to permanently eliminate pet odors and keep your home fresh.

First Step: Identify Problem Areas

Before jumping into cleaning, it’s important to locate the source of odors. Sometimes, a smell may linger even if no stain is visible. A blacklight or UV flashlight can help reveal hidden spots, especially on carpet or furniture. Mark the areas needing attention so you can target them effectively during the cleaning process.

Cleaning Techniques That Work

When it comes to pet stain and odor removal, timing is everything. The quicker you clean up after an accident, the less likely it is to become a permanent issue. Here are some tried-and-true steps:

Blot, Don’t Rub: If the mess is fresh, use paper towels or a cloth to blot up as much liquid as possible. Rubbing can push the stain deeper into the carpet or fabric.

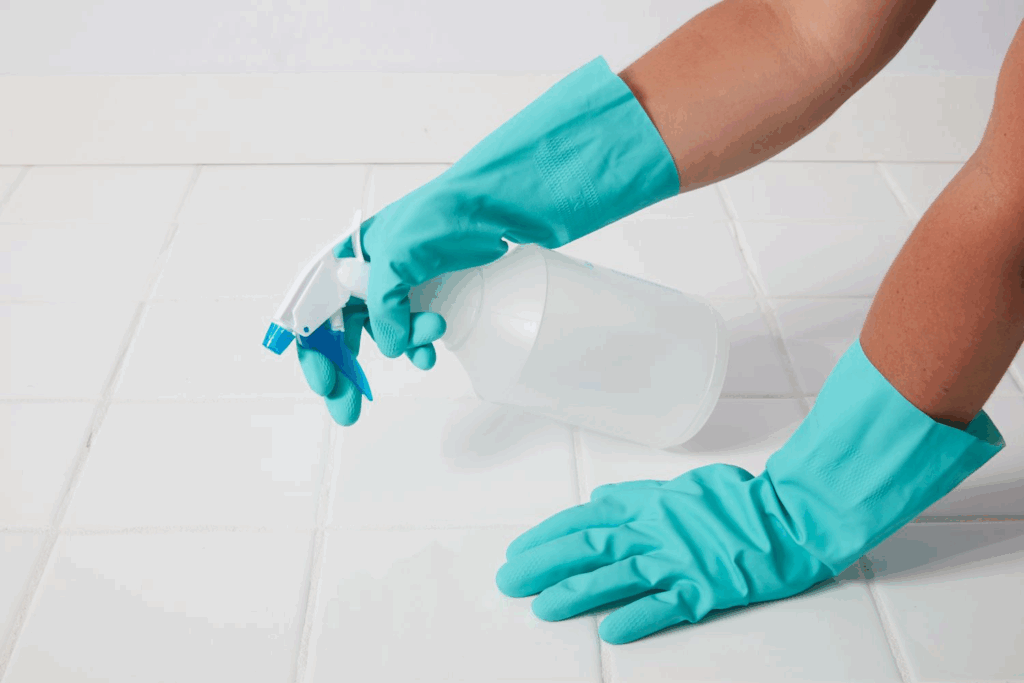
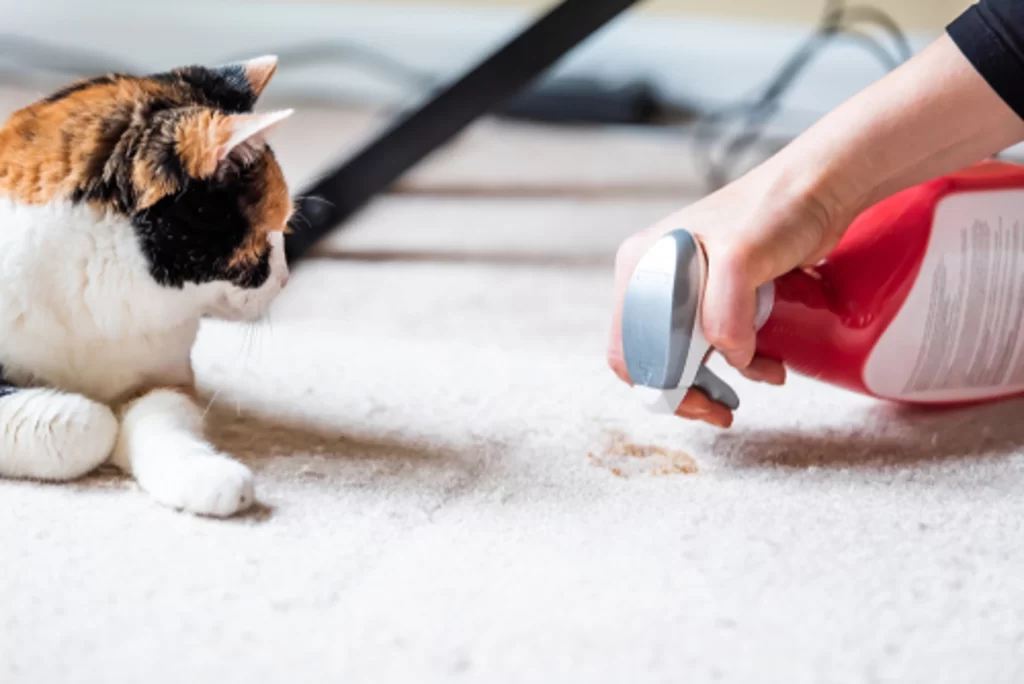
Use Enzymatic Cleaners: These cleaners are specifically formulated to break down the proteins in pet urine and eliminate the smell at its source. Be sure to follow the product instructions and let it sit for the recommended time.

Steam Clean (When Necessary): For deeply embedded smells, a steam cleaner can help lift out stubborn odors and bacteria. However, avoid using steam directly on urine stains initially, as heat can set the stain and odor.

Air Out the Room: Open windows and use fans to increase ventilation. Fresh air helps remove lingering smells and can prevent a buildup of indoor pollutants.

Use Baking Soda for Mild Odors: Sprinkle baking soda over the affected area and leave it overnight before vacuuming. It’s a natural deodorizer that can help with minor smells.

Preventative Measures for a Fresh-Smelling Home

Once you’ve removed existing odors, taking steps to prevent future ones can make a big difference in your home environment.

Regular Grooming: Keep your pets clean with regular baths and brushing. This reduces the amount of dander, oils, and dirt they bring into your home.

Frequent Washing: Wash pet beds, blankets, and toys regularly. These can harbor odors and bacteria over time.

Litter Box Maintenance: If you have cats, scooping the litter box daily and replacing the litter regularly will drastically reduce odor buildup.

Scheduled Deep Cleaning: Consider having carpets and upholstery professionally cleaned a few times a year, especially if you have multiple pets.

When to Call the Professionals

Sometimes, home remedies and store-bought solutions just don’t cut it. If your pet odor problem is severe or persistent, it may be time to call in professionals who specialize in pet stain and odor removal. They have industrial-grade equipment and solutions that can penetrate deeper than consumer products, and they’ll often offer guarantees to ensure your satisfaction.

Enjoy Your Pets Without the Smell

Living with pets doesn’t mean you have to sacrifice a fresh and inviting home. With the right tools, techniques, and a little bit of diligence, you can manage odors effectively and keep your space welcoming to both guests and family members. By understanding the science behind pet odors and taking a proactive approach to cleaning, you can enjoy the best of both worlds—happy pets and a clean home.

Shower Tile Restoration: Bringing Back the Sparkle to Your Bathroom

Let’s face it—your bathroom should be a sanctuary, a place to refresh and relax. But over time, the sparkle fades. Grime settles in, grout darkens, and those once-glossy shower tiles start looking dull and tired. The good news? You don’t need a full remodel to reclaim that spa-like feel. Shower tile restoration is a smart, cost-effective way to breathe new life into your bathroom, giving it a fresh, clean look without the expense and hassle of a full renovation.

What Is Shower Tile Restoration?

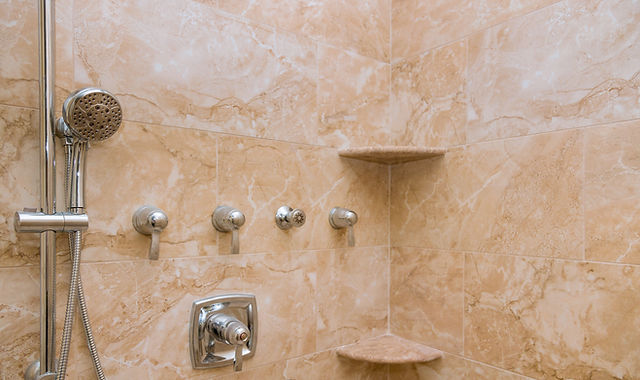
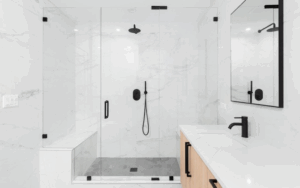
Shower tile restoration is a process designed to clean, repair, and revive existing tile and grout surfaces. Instead of tearing out old tiles, restoration focuses on deep cleaning, regrouting, resealing, and sometimes recoloring tiles to make them look brand new. It’s a fantastic solution for homeowners who want to improve their bathroom’s appearance without breaking the bank.

Whether your tiles are ceramic, porcelain, or natural stone, restoration can work wonders. Stains, soap scum, mildew, and hard water deposits are no match for a professional restoration process. And even cracked or chipped grout lines can be patched and sealed for a smooth, uniform finish.

Why Do Shower Tiles Deteriorate?

Shower tiles are exposed to a unique set of challenges. Constant moisture, humidity, and frequent temperature fluctuations create the perfect breeding ground for mold and mildew. Over time, grout lines absorb water and start to discolor. Soap scum builds up, mineral deposits settle in, and before you know it, your bright shower becomes a dull reminder of what it used to be.

Regular cleaning helps, but once mold penetrates grout or calcium builds up on the tile surface, no amount of scrubbing will truly restore its original shine. That’s when shower tile restoration becomes essential.

The Benefits of Restoring Your Shower Tile

  1. Cost-Effective: Full renovations can cost thousands of dollars. Restoration, on the other hand, delivers a noticeable transformation at a fraction of the cost.
  2. Fast Turnaround: Unlike remodeling, which could leave your bathroom unusable for weeks, shower tile restoration can often be completed in just a day or two.
  3. Eco-Friendly: Rather than sending old tiles to the landfill, restoration makes the most of what you already have. It’s a greener, more sustainable choice.
  4. Increased Home Value: A sparkling, well-maintained bathroom is a major selling point. Restoration can boost your home’s appeal, whether you’re preparing to sell or just investing in your comfort.

The Restoration Process: What to Expect

The first step in any shower tile restoration project is a thorough inspection. Professionals look for mold, water damage, and structural issues that might require more than surface-level repairs.

Once the inspection is complete, the restoration process typically involves:

Deep Cleaning: Specialized cleaning agents break down soap scum, mold, and mineral buildup on both tile and grout.

Grout Repair: Cracked, crumbling, or missing grout is removed and replaced with fresh, color-matched material.

Tile Sealing: A protective sealant is applied to repel water and prevent future staining or mold growth.

Optional Color Enhancement: Some companies offer color sealing services, which can make grout lines look brand new or even change their color to better match your aesthetic.

The result? A shower that not only looks brand new but is also easier to clean and maintain going forward.

DIY vs. Professional Restoration

While it’s tempting to tackle the job yourself, especially with so many products on the market, professional restoration typically delivers far better and longer-lasting results. Experts have access to industrial-grade cleaners, precision tools, and years of experience, making it easier to avoid costly mistakes.

That said, if you’re on a tight budget and enjoy hands-on projects, there are effective DIY shower tile cleaning kits available. Just be sure to follow directions carefully and avoid harsh chemicals that could damage your tiles or grout.

Keeping Your Shower Tile Sparkling

Once your shower tiles have been restored, regular maintenance is key to keeping them looking great. Here are a few simple tips:

Wipe down after use: A quick squeegee or towel dry prevents water spots and soap buildup.

Use gentle, pH-balanced cleaners: Avoid bleach and acidic cleaners that can erode grout and tile surfaces.

Seal grout annually: Reapplying sealant helps keep moisture and mold at bay.

Ventilate: Use an exhaust fan or open windows to reduce humidity levels after each shower.

Restoring your shower tile is more than just a cosmetic upgrade—it’s an investment in your home’s cleanliness, value, and overall ambiance. Whether you’re prepping for guests, selling your home, or simply tired of looking at stained grout, shower tile restoration offers a quick and effective solution. With the right approach, your bathroom can regain that fresh, inviting sparkle that makes every shower feel like a mini retreat.

Kitchen Tile Care: Preventing Stains and Enhancing Durability

Kitchen tiles are a practical and stylish choice for any cooking space, offering both beauty and functionality. From sleek subway tiles to rustic ceramics and glossy porcelain finishes, kitchen tile surfaces can withstand daily wear and tear—if they’re properly maintained. Caring for your kitchen tile not only keeps your space looking clean and inviting but also extends the lifespan of the materials, preventing stains and enhancing overall durability.

Here’s how you can take care of your kitchen tiles the right way.

  1. Daily Cleaning for Long-Term Shine

One of the simplest and most effective ways to protect your kitchen tile is by cleaning it regularly. Daily maintenance prevents grime, oil splatter, and food particles from building up and causing damage over time. A quick wipe-down with a soft cloth or mop and a mild detergent is often all it takes.

Avoid using harsh chemicals or abrasive scrubbers, as these can scratch the tile surface or wear down any protective coating. Instead, use a gentle, pH-neutral cleaner. For a natural solution, a mix of warm water and white vinegar works well on most tile types.

  1. Seal the Grout—and Reapply as Needed

Even if your kitchen tile is stain-resistant, the grout between tiles is usually more porous and prone to discoloration. Over time, grout can absorb moisture, grease, and food residue, leading to unsightly stains or even mold growth.

To prevent this, apply a grout sealer every 6 to 12 months. Sealing helps to create a barrier against moisture and staining agents, making clean-up easier and extending the life of the grout lines. When applying the sealer, ensure the grout is clean and dry, and use a small brush or applicator to reach every crevice.

  1. Handle Spills Promptly

Kitchen spills are inevitable, but letting them sit too long can cause permanent stains—especially with porous materials like natural stone or unsealed grout. Whether it’s coffee, wine, tomato sauce, or oil, clean up spills as soon as they happen.

Use an absorbent cloth or paper towel to blot (not scrub) the mess, then wipe the area clean with warm water and a mild cleaning solution. Prompt action will protect both the tile surface and the grout from long-term damage.

  1. Prevent Scratches and Chips

While kitchen tile is durable, it’s not indestructible. Dropping heavy cookware, dragging furniture, or using harsh scrubbers can lead to cracks or chips in the tile. To minimize risk, consider the following tips:

Use mats or rugs in high-traffic areas and under sinks.

Install felt pads on the bottoms of chairs and tables.

Avoid dropping sharp or heavy objects onto tile surfaces.

If a tile does crack or chip, repair it quickly to prevent the damage from spreading or moisture from seeping underneath.

  1. Deep Clean Seasonally

Along with daily care, seasonal deep cleaning is essential for keeping your kitchen tile looking its best. This process helps to remove built-up dirt and grease that may not come off during routine cleaning.

For a deep clean:

Mix baking soda and water into a paste and gently scrub the tile and grout with a soft brush.

Rinse with warm water and dry thoroughly.

For stubborn grout stains, use a specialized grout cleaner or a steam cleaner for a more thorough clean.

A deep clean every 3 to 4 months can revive the look of your kitchen tiles and help you spot any early signs of wear.

  1. Use the Right Products for Your Tile Type

Different types of kitchen tile require different care. For example, ceramic and porcelain tiles are fairly low maintenance, while natural stone tiles like marble, slate, or travertine need more specialized products to avoid damage.

Always check the manufacturer’s recommendations for cleaning and sealing based on the type of tile you have. Using the wrong product can dull the finish or cause etching, especially on sensitive surfaces.

  1. Enhancing Durability Through Routine Maintenance

Ultimately, a little routine maintenance goes a long way in enhancing the durability of your kitchen tile. By keeping surfaces clean, sealing grout, and addressing issues like cracks and stains promptly, you ensure that your tile remains a resilient and attractive feature of your kitchen for years to come.

Whether you’re working with ceramic, stone, or glass tile, consistent care is the key to maximizing its value and appearance.

Kitchen tiles are both a design element and a functional surface that face a lot of wear from daily cooking, cleaning, and foot traffic. By taking simple but effective steps to prevent stains and enhance durability, you can maintain the beauty and integrity of your kitchen tile for the long haul. With regular cleaning, proper sealing, and prompt repairs, your tiles will continue to shine—making your kitchen a welcoming and efficient space for every meal.